
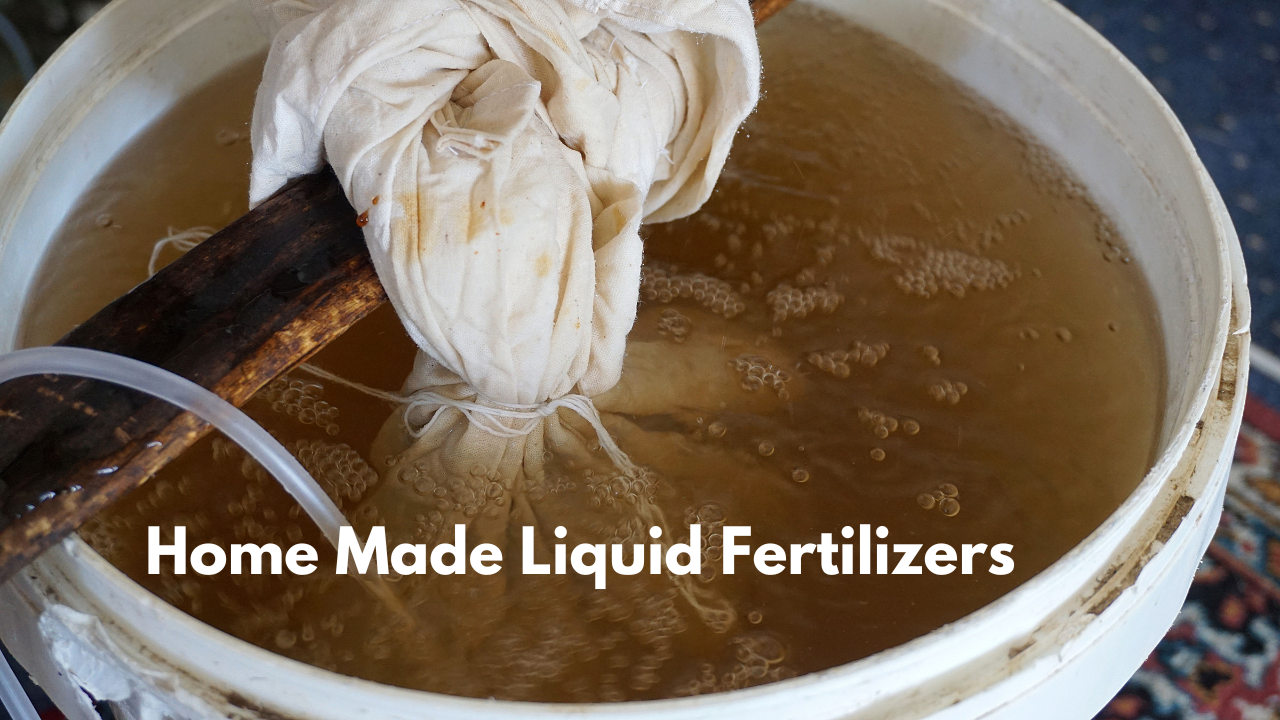
How to Make Liquid Fertilizer at Home
Growing healthy plants does not always require expensive fertilizers from the garden store. In fact, you can make a simple and effective liquid fertilizer at home using materials that are already available in your kitchen or garden. This homemade fertilizer is easy to prepare, costs very little, and provides your plants with many of the nutrients they need for healthy growth.
Making liquid fertilizer at home is also a great way to recycle organic waste instead of throwing it away. Fruit peels, vegetable scraps, grass clippings, dry leaves, and compost can all be turned into a nutrient-rich fertilizer. Besides saving money, this method is environmentally friendly and helps reduce household waste.
In this guide, you will learn what liquid fertilizer is, why it is beneficial, what materials you need, and how to prepare it step by step.
What Is Liquid Fertilizer?
Liquid fertilizer is a plant food that is mixed with water before being applied to plants. Unlike solid fertilizers, liquid fertilizers provide nutrients in a form that plants can absorb more quickly. This makes them especially useful during the active growing season when plants need a regular supply of nutrients.
Homemade liquid fertilizer is made by soaking organic materials in water for several days or weeks. During this time, the nutrients slowly move from the organic materials into the water, creating a natural Organic fertilizer that can be used around the roots or sprayed on the leaves after proper dilution.
One thing many gardeners appreciate about liquid fertilizer is how quickly plants respond to it. When used correctly, plants often develop greener leaves, stronger stems, and healthier growth within a short period.
Benefits of Homemade Liquid Fertilizer
Homemade liquid fertilizer is an easy and natural way to feed your plants. It offers many benefits for both your garden and the environment.
Suitable for Most Plants: Works well for vegetables, flowers, herbs, fruit plants, and indoor plants.
Saves Money: Uses materials that are already available at home.
Reduces Waste: Recycles kitchen scraps and garden waste instead of throwing them away.
Eco-Friendly: Reduces the need for chemical fertilizers and supports sustainable gardening.
Improves Soil Health: Encourages beneficial microbes that help plants absorb nutrients.
Provides Quick Nutrition: Plants absorb nutrients faster because they are dissolved in water.
Easy to Make: Requires simple materials and very little effort.
Materials You Will Need
Before you begin, collect all the materials you need. Most of them are easy to find around the house.
Organic Materials
You can use one or a combination of the following materials:
- Grass clippings
- Dry leaves
- Vegetable scraps
- Fruit peels
- Banana peels
- Eggshells
- Compost
- Fresh weeds without seeds
Try to avoid using meat, fish, dairy products, oily foods, or cooked food because these can create unpleasant smells and attract insects or animals.
Other Materials
You will also need:
- A large plastic bucket or container
- Clean water
- A wooden stick for stirring
- A loose lid or clean cloth
- A strainer or fine cloth
- Bottles or containers for storage
If possible, use rainwater or tap water that has been left standing overnight. This allows chlorine to evaporate, making the water better for beneficial microbes.
Step-by-Step Guide to Make Liquid Fertilizer at Home
Making homemade liquid fertilizer is simple. You only need a little patience while the organic materials break down naturally.
Step 1: Collect Organic Materials
Start by collecting fresh organic materials from your kitchen and garden. A mixture of green and dry materials usually gives better results because it provides a wider range of nutrients.
Banana peels are rich in potassium, grass clippings provide nitrogen, and compost adds many beneficial microorganisms. Eggshells can also be added as a source of calcium.
Cut large pieces into smaller pieces before adding them to the container. Smaller pieces break down faster and release nutrients more easily.
Step 2: Fill the Container
Place the organic materials into the bucket until it is about half full.
Do not press the materials down too tightly. Leaving some space between them allows water and air to move through the mixture, helping the natural breakdown process.
Using a larger container than necessary is also helpful because it leaves room for stirring during fermentation.
Step 3: Add Water
Pour clean water into the container until all the organic materials are completely covered.
Make sure none of the materials are sticking out above the water. Keeping everything submerged helps the decomposition process happen more evenly.
Many experienced gardeners prefer using rainwater because it does not contain chlorine, but tap water that has been left overnight also works well.
Step 4: Mix Everything Well
Use a wooden stick or any clean tool to stir the mixture thoroughly. Mixing helps spread moisture throughout the container and allows beneficial microorganisms to work more effectively.
At this stage, the mixture may simply look like water with plant materials floating inside. Over the next few days, you will notice changes in its color and smell as fermentation begins.
This completes the first stage of making homemade liquid fertilizer. In the next part, we will continue with the fermentation process, explain how to strain and dilute the fertilizer, and show you the correct way to apply it for the best results.
Step 5: Cover the Container
After mixing everything well, cover the container with a loose lid or a clean cloth. Do not seal the container tightly because the mixture needs some airflow during fermentation.
Place the container in a cool and shaded area. Avoid keeping it in direct sunlight, as too much heat can slow down the natural process and affect the quality of the fertilizer.
Step 6: Let It Ferment
Leave the mixture to ferment for about 2 to 3 weeks. During this time, the organic materials will slowly break down and release nutrients into the water.
Stir the mixture every two or three days. Regular stirring helps add oxygen, improves decomposition, and keeps the mixture from becoming too thick.
As the days pass, the liquid will become darker in color. You may also notice a mild earthy smell. This is a normal part of the fermentation process. However, if the mixture develops a very strong rotten smell, it may contain materials that should not have been added, such as meat or oily food.
Patience is important during this step. Giving the mixture enough time to ferment will produce a richer and more effective liquid fertilizer.
Step 7: Strain the Liquid
Once the fermentation period is complete, it is time to separate the liquid from the solid materials.Place a strainer or a clean cloth over another bucket or container and slowly pour the mixture through it. The liquid that passes through is your homemade liquid fertilizer.
Do not throw away the leftover solid material. It still contains valuable organic matter and can be added to your compost pile or mixed into your garden soil. This way, nothing goes to waste.
Transfer the filtered liquid into clean bottles or containers with lids. Store them in a cool, shaded place until you are ready to use them.
Step 8: Dilute Before Use
The liquid fertilizer is highly concentrated, so it should always be diluted before applying it to plants. A simple and safe ratio is one part liquid fertilizer mixed with ten parts water. For example, mix one cup of fertilizer with ten cups of water.
Diluting the fertilizer helps protect plant roots from receiving too many nutrients at once. It also allows the plants to absorb the nutrients more evenly.
If you are using the fertilizer on young seedlings or delicate indoor plants, you can make the solution even weaker by adding a little more water.
How to Apply Homemade Liquid Fertilizer
Now that your fertilizer is ready, it is important to use it correctly. Proper application helps plants absorb nutrients while avoiding overfeeding.
Soil Application
The easiest method is to pour the diluted fertilizer directly around the base of the plant. This allows the roots to absorb the nutrients from the soil.
Try not to pour the fertilizer directly against the stem. Instead, apply it a few inches away from the stem so the roots can take it up naturally. Applying the fertilizer after normal watering often gives better results because moist soil absorbs nutrients more easily.
Foliar Spray
Homemade liquid fertilizer can also be sprayed on plant leaves. Fill a clean spray bottle with the diluted fertilizer and lightly spray both the upper and lower sides of the leaves.
The best time to spray is early in the morning or late in the afternoon when the weather is cooler. Avoid spraying during the hottest part of the day because the leaves may become damaged.
Many gardeners use both soil application and foliar feeding during the growing season to support healthy plant growth.
How Often Should You Use Liquid Fertilizer?
Homemade liquid fertilizer does not need to be applied every day.
For most vegetables, flowers, herbs, and fruit plants, applying it once every one to two weeks is enough during the active growing season.
During winter or when plant growth slows down, reduce the number of applications because plants need fewer nutrients at that time.
Remember that more fertilizer does not always mean better growth. Giving plants the right amount at the right time usually produces the best results.
Best Plants for Homemade Liquid Fertilizer
One of the biggest advantages of homemade liquid fertilizer is that it can be used on many different plants.
It works well for:
- Vegetables such as tomatoes, peppers, cucumbers, spinach, and lettuce
- Flowering plants such as roses, marigolds, and hibiscus
- Fruit plants including strawberries and other small fruit crops
- Herbs such as mint, basil, coriander, and parsley
- Indoor plants that need regular feeding
- Garden shrubs and ornamental plants
Although most plants benefit from homemade liquid fertilizer, always observe how your plants respond. If you notice yellow leaves or slow growth after feeding, reduce the amount or increase the dilution.
Tips for the Best Results
Following a few simple tips can make your homemade fertilizer even more effective.
- Use fresh organic materials whenever possible.
- Avoid adding meat, dairy products, cooked food, or oily waste.
- Stir the mixture every few days during fermentation.
- Keep the container in a shaded location.
- Always dilute the fertilizer before use.
- Label your storage bottles so you know what they contain.
- Use the fertilizer within a few weeks for the best quality.
- Apply it during the morning or evening instead of the hottest part of the day.
These small practices can make a noticeable difference in the health of your plants.
Common Mistakes to Avoid
Many beginners make a few simple mistakes when preparing homemade liquid fertilizer. Avoiding these mistakes will help you achieve better results.
One common mistake is using too much fertilizer. Even natural fertilizers can harm plants if applied in large amounts.
Another mistake is forgetting to dilute the fertilizer before use. Concentrated fertilizer may burn plant roots or leaves.
Some people tightly seal the container during fermentation. This limits airflow and may affect the fermentation process.
Using fresh manure without proper composting is another mistake because it can contain harmful bacteria and too much ammonia.
Finally, avoid placing the container in direct sunlight throughout the fermentation period. A cool, shaded place is always a better choice.
Why Homemade Liquid Fertilizer Works
Plants need nutrients such as nitrogen, phosphorus, and potassium to grow well. Organic materials naturally contain many of these nutrients.
As the materials break down in water, the nutrients are released into the liquid. When this diluted liquid is applied to the soil or leaves, plants can absorb the nutrients more easily.
Another important benefit is that homemade fertilizer encourages beneficial microorganisms in the soil. These tiny organisms help break down organic matter and make nutrients more available to plant roots.
With regular use, many gardeners notice greener leaves, stronger stems, healthier roots, and better flowering or fruit production.
Frequently Asked Questions
Can I use only kitchen waste to make liquid fertilizer?
Yes. Fruit peels, vegetable scraps, banana peels, and eggshells all work well. Just avoid meat, dairy products, and oily foods.
How long does homemade liquid fertilizer last?
If stored in a cool and shaded place, it is best used within two to four weeks. Fresh fertilizer usually gives better results.
Can I use it on indoor plants?
Yes. Homemade liquid fertilizer is suitable for most indoor plants. Just make sure it is properly diluted before use.
Does homemade liquid fertilizer smell?
A mild earthy smell is normal during fermentation. A strong rotten smell usually means unsuitable materials were added or the mixture was not prepared correctly.
Can I apply it every week?
Yes. Most plants can be fed every one to two weeks during their active growing season. Always watch your plants and adjust the schedule if needed.
What should I do with the leftover solid material?
The leftover organic material can be added to a compost pile or mixed into garden soil. It still contains valuable organic matter that can improve soil health.
Conclusion
Making liquid fertilizer at home is one of the easiest and most affordable ways to feed your plants naturally. With just a few simple materials and a little patience, you can create a nutrient-rich fertilizer that supports healthy growth while reducing kitchen and garden waste.
Whether you grow vegetables, flowers, herbs, or indoor plants, homemade liquid fertilizer can become a valuable part of your gardening routine. It is easy to prepare, safe for the environment, and helps improve both plant health and soil quality.
If you are new to gardening, start with a small batch and see how your plants respond. As many experienced gardeners have found, simple homemade solutions often work just as well as expensive commercial products.
